Voice
Casola converts text into natural-sounding speech. Navigate to /voice in Studio to get started.
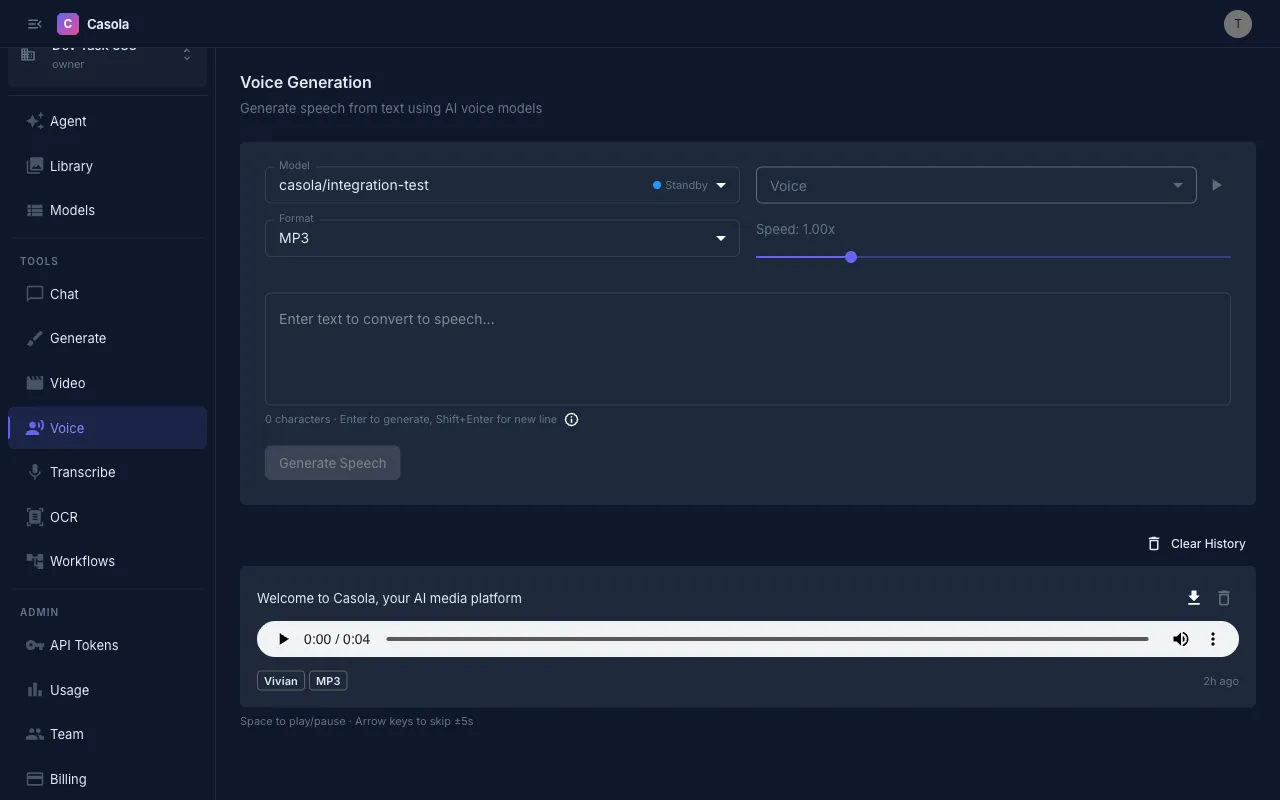
Generating speech
Section titled “Generating speech”- Select a model — Choose a TTS model from the dropdown. Casola currently supports Qwen3 TTS for speech synthesis. See the Models reference for the latest options.
- Pick a voice — Each model offers a set of voices with different characteristics. The dropdown shows the voice name, description, and language. Click the preview button next to the voice selector to hear a short sample before committing.
- Enter your text — Type or paste the text you want spoken. Press Enter to generate, or Shift+Enter to add a new line.
- Generate — Click the button (or press Enter) and your audio will be ready in a few seconds.
Audio format
Section titled “Audio format”Choose your output format before generating:
| Format | Best for |
|---|---|
| MP3 | General use, small file size |
| WAV | Lossless quality, audio editing |
| OPUS | Streaming, low bandwidth |
| FLAC | Lossless with compression |
| AAC | Apple ecosystem, podcasts |
Playback speed
Section titled “Playback speed”Use the Speed slider to adjust playback from 0.25x to 4.0x. This is set before generation and affects the output file itself, not just preview playback.
Formatting tips
Section titled “Formatting tips”How you write your text affects how it sounds:
- Ellipsis (…) — Creates a longer pause
- Commas — Add short pauses for natural pacing
- CAPS — Emphasizes a word
- Question marks — Produce rising intonation
- Hyphens — E-nun-ci-ate individual syllables
Working with results
Section titled “Working with results”Each generated audio clip appears in your history with the voice name, format, speed, and timestamp. You can:
- Play the audio directly with the inline player (Space to play/pause, arrow keys to skip)
- Download the file in your chosen format
- Retry a failed generation
- Delete individual entries or clear all history
All generated audio is automatically saved to your Library for later access.
API usage
Section titled “API usage”Text-to-speech
Section titled “Text-to-speech”curl https://api.casola.ai/openai/v1/audio/speech \ -H "Authorization: Bearer YOUR_API_TOKEN" \ -H "Content-Type: application/json" \ -d '{ "model": "Qwen3-TTS", "input": "Hello! Welcome to Casola.", "voice": "alloy", "response_format": "mp3", "speed": 1.0 }' \ --output speech.mp3The response is the binary audio file. Use --output to save it directly.
Async mode
Section titled “Async mode”For longer text, use async mode to avoid timeouts:
# Submitcurl https://api.casola.ai/openai/v1/audio/speech \ -H "Authorization: Bearer YOUR_API_TOKEN" \ -H "Content-Type: application/json" \ -d '{ "model": "Qwen3-TTS", "input": "A longer passage of text to convert to speech...", "voice": "alloy", "response_format": "wav", "async": true }'Response (202):
{ "id": "job_abc123", "object": "audio.speech.async", "status": "pending"}Poll for the result using GET /fal/requests/{id}.
List available voices
Section titled “List available voices”curl https://api.casola.ai/api/voice/models \ -H "Authorization: Bearer YOUR_API_TOKEN"Response:
{ "voice_models": [ { "model_id": "Qwen3-TTS", "label": "Qwen3 TTS", "voices": [ { "id": "alloy", "name": "Alloy", "description": "Neutral and balanced", "language": "en" } ] } ]}Python (OpenAI SDK)
Section titled “Python (OpenAI SDK)”from openai import OpenAI
client = OpenAI( base_url="https://api.casola.ai/openai/v1", api_key="YOUR_API_TOKEN",)
response = client.audio.speech.create( model="Qwen3-TTS", input="Hello! Welcome to Casola.", voice="alloy", response_format="mp3",)response.stream_to_file("speech.mp3")- Preview voices before generating long passages — each voice has a distinct tone and cadence.
- Use punctuation deliberately to control pacing; a well-placed comma or ellipsis makes speech sound more natural.
- For long-form content (articles, scripts), break text into shorter paragraphs and generate each separately for more consistent quality.
- WAV or FLAC are best when you plan to edit the audio afterward; MP3 is fine for direct use.